The other day in one of my posts, I shared how detachable collars were really in this spring and summer. Today, I am going to share with you how you can create your own. It is very easy and it can cost you little to no money.
Materials:
Pattern
Fabric- yard
Medium Weight Interfacing- yard
Scissors
Straight Pins
Iron
Sewing Machine
Sewing Needle
Thread
Hook and eye
To begin this project you will need to print out a
pattern. The pattern that I used
can be found here.
How
to print out pattern:
1.
Click link: Peter Pan Collar Pattern
2.
Click on the Peter Pan collar pattern file
3.
On the button bar, click options
4.
When the options bar scrolls down, click download
5.
After it finished downloading, open the file
6.
Go to file, print
7.
When the print window appears, double check to
see if the whole pattern is being printed.
MAKE SURE THE SCALE IS 100% (NOT scale to fit)
8.
Press print and cut out
After you have printed out the pattern it is time to get your fabric. I had some extra floral fabric from another project so I used that. You can use fabric from the store or you can even use an old shirt or skirt that you don’t wear anymore.
Don’t forget to preheat your iron on medium!
DIY Peter Pan Collar
Step 1:
Lay out fabric and place pattern. You want to cut out 2 pieces of the pattern out
of your fashion fabric.
Step 2:
Lay out your interfacing cut out 1 piece.
Take 1 piece of your fashion fabric and take your
interfacing piece. You want to lay the
WRONG SIDE of the fashion fabric on top of ROUGH side of the interfacing. Go to your iron and fuse the pieces together.
(You DO NOT want to rub the iron on top on the fabric. Simply place the iron down for a few seconds,
pick it back up, and place it again on the fabric) Repeat this step till the two pieces are
fused together completely.
Take your fused piece of fashion fabric and your un-fused
piece of fashion fabric and lay the RIGHT SIDES together. Pin around the collar so the pieces do not
move.
Step 5:
Prepare your sewing machine.
Take your pinned fabric to your sewing machine and sew all the way
around the collar. This pattern has a ½
inch seam allowance. Make sure you leave
a space unsewn so you can flip the right sides out.
Step 6:
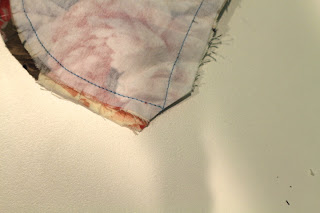
Take your scissors and clip the seam allowance around the
whole collar.
Step 7:
Turn your collar right side out. Make sure you get your corners to a point.
You now want to close the opening of collar. You can do this by hand stitching, but I chose to top stitch the collar closed with my sewing machine.
Step 9:
Take your hook and eye and sew them on the points of the
collar in a cross-stitch motion.


No comments:
Post a Comment